Here is my major projects for photography. Dates shall be posted
to keep track of the flow of my photos, enjoy!
Photos here are all credited to © Kayla Watson, unless otherwise stated within the description.
to keep track of the flow of my photos, enjoy!
Photos here are all credited to © Kayla Watson, unless otherwise stated within the description.
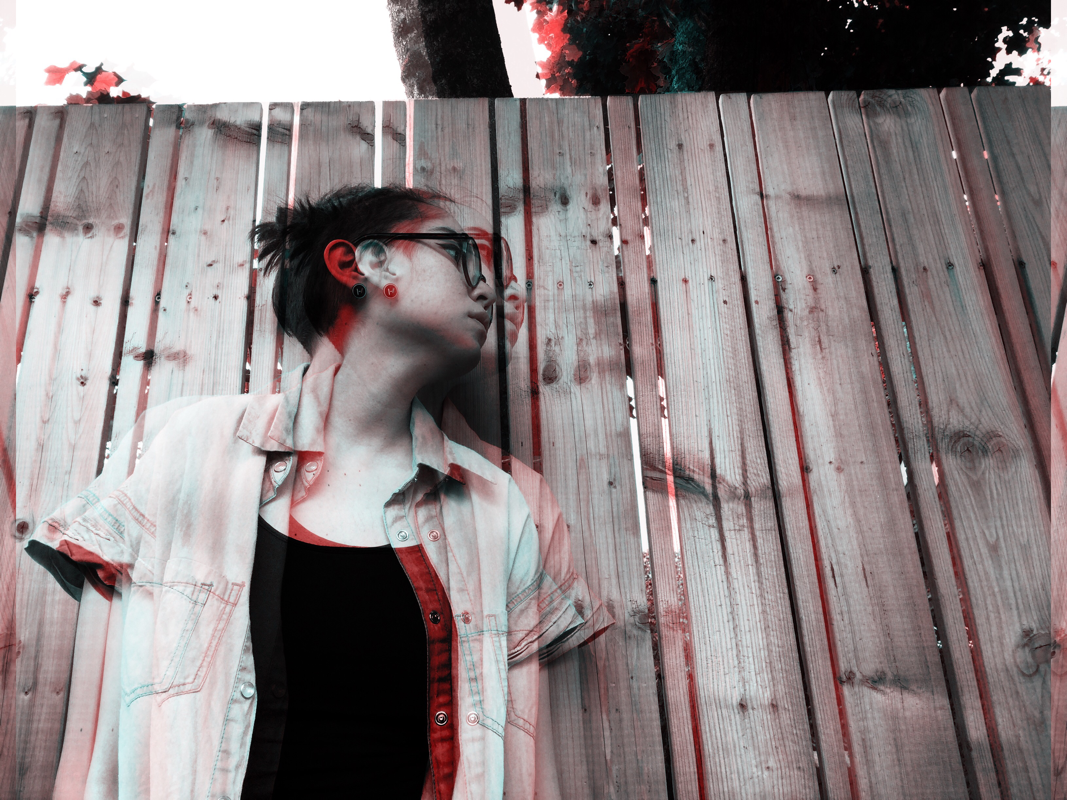
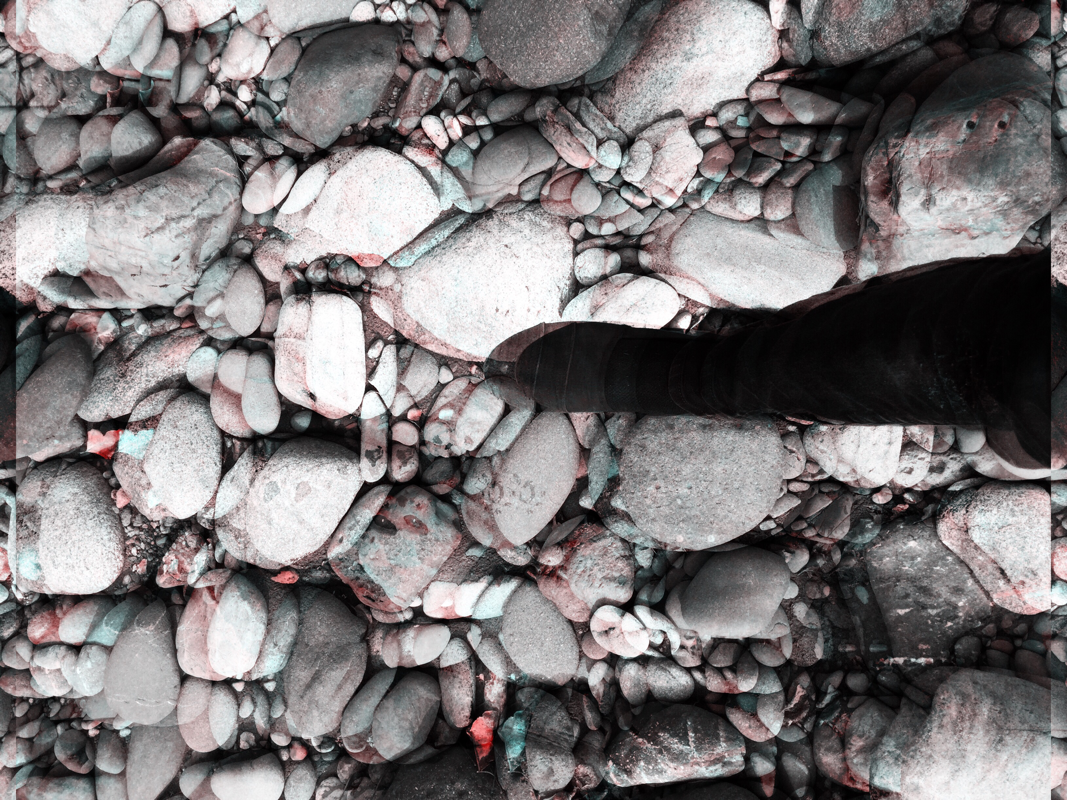
Independent Project - "Holga" styled photos - June 5th/2017
For this independent project I decided to take some holga styled photos. With the help of photoshop of course! Here's a website that gives some helpful tips and tricks to use/take holga photos!: http://holgajen.blogspot.ca/2010/03/8-tips-for-holga-newbies.html?m=1
Since I do not own a holga camera, I used photoshop CS6 as my editor. Be patient and follow this tutorial here on YouTube: https://youtu.be/zGP3BqHp7o8
Your photos should come out amazingly with some practice! Have fun and enjoy!
Since I do not own a holga camera, I used photoshop CS6 as my editor. Be patient and follow this tutorial here on YouTube: https://youtu.be/zGP3BqHp7o8
Your photos should come out amazingly with some practice! Have fun and enjoy!


Independent project: Portraits - June 1st/2017
Welcome to another independent project, Portraits! I found this project to be fun and shed some like on self portraiture. I loved posing and taking countless photos, very enjoyable and well worth the outcome. With my research I found that taking portraits can be hard, yet very fascinating.
I found this website to be very helpful with tips and tricks: http://www.techradar.com/how-to/photography-video-capture/cameras/14-portrait-photography-tips-you-ll-never-want-to-forget-1320776
A quote that speaks with emotion and that I love to bits is a quote by fellow Jean-Luc Godard - "When you photograph a face, you photograph the soul behind it."


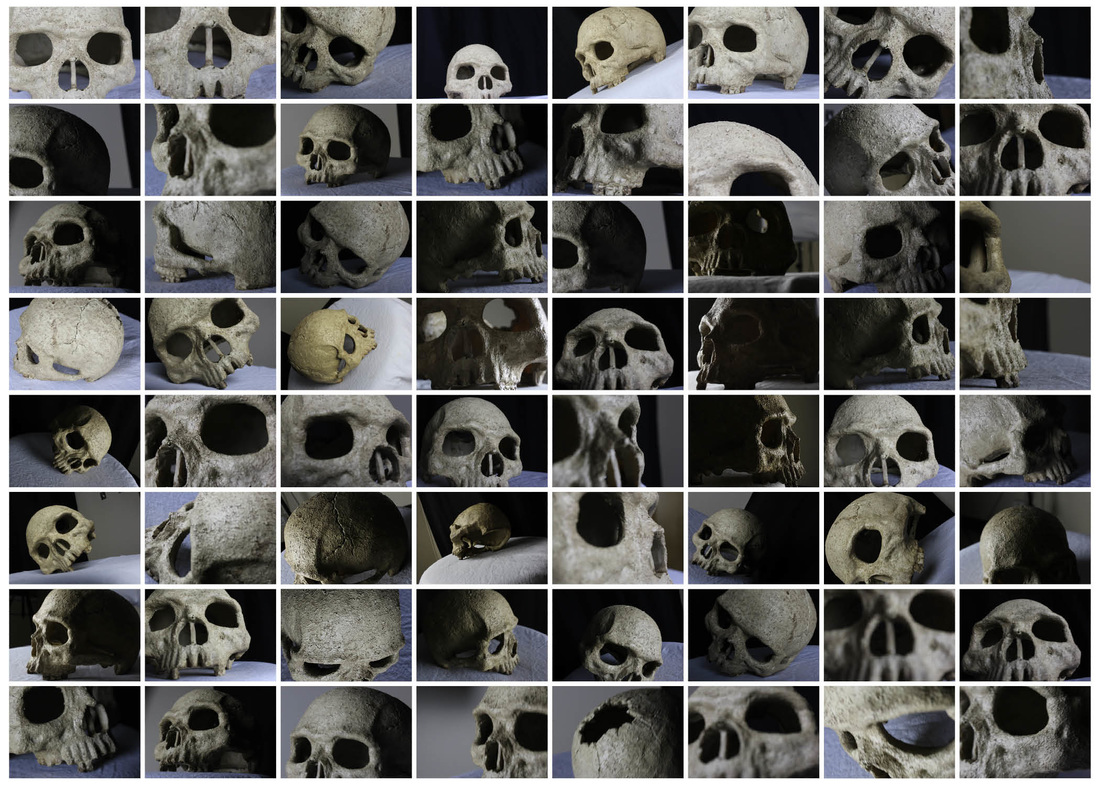
Grade 12 Workshop - Textures May 30th/2017


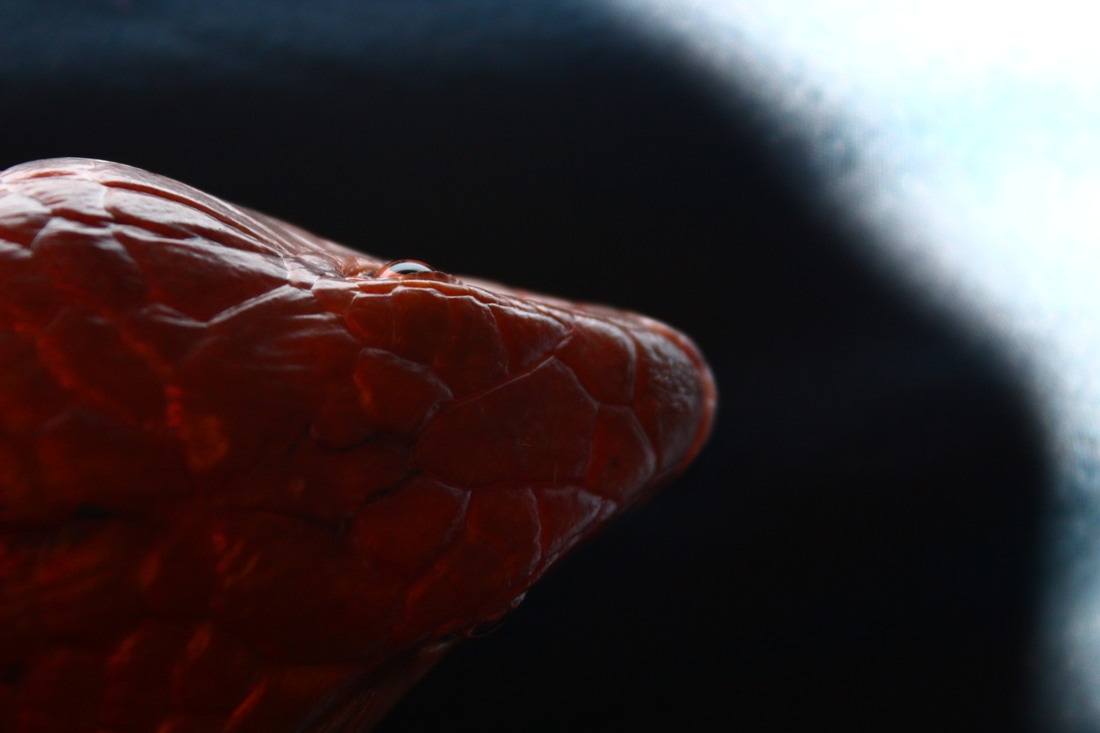


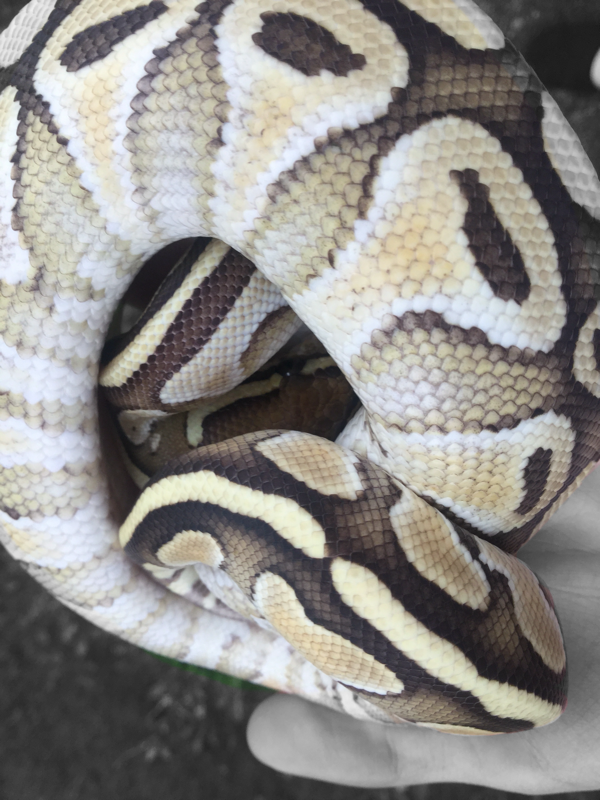
My workshop consists of textures within photography. I chose animals with textures.
While taking various photos of my animals, I found that letting them do their own thing and you the photographer should remain patient, as this project will take a while.
For my settings I used close up, portrait, landscape & manual exposure. These settings enable you to get up close and personal with the subject/textures your taking photos of. For my photos, I used flash & a black background to get the affect of my animals looking like models. To do this use a black blanket or black paper to show the affect, which some photographers use to make textures, colours, or even the subject to stand out. This gives your photos a professional look.
Animals are on the go, so taking photos can be a hassle at times. Use a fast shutter speed and be patient. Also, take plenty of photos, as it will take you a while before you get the right shot.
Textures are also come in a variety. You find textures in leaves, ground/gravel, etc etc. Textures can be found in everything, thus try your best to find textures in areas you wouldn't think of.
While taking photos of textures, you can see that within my photos that there is a lot of textures upon textures. When this happens the textures layer upon each other, some may stand out than others but it is very noticeable and quite unique.
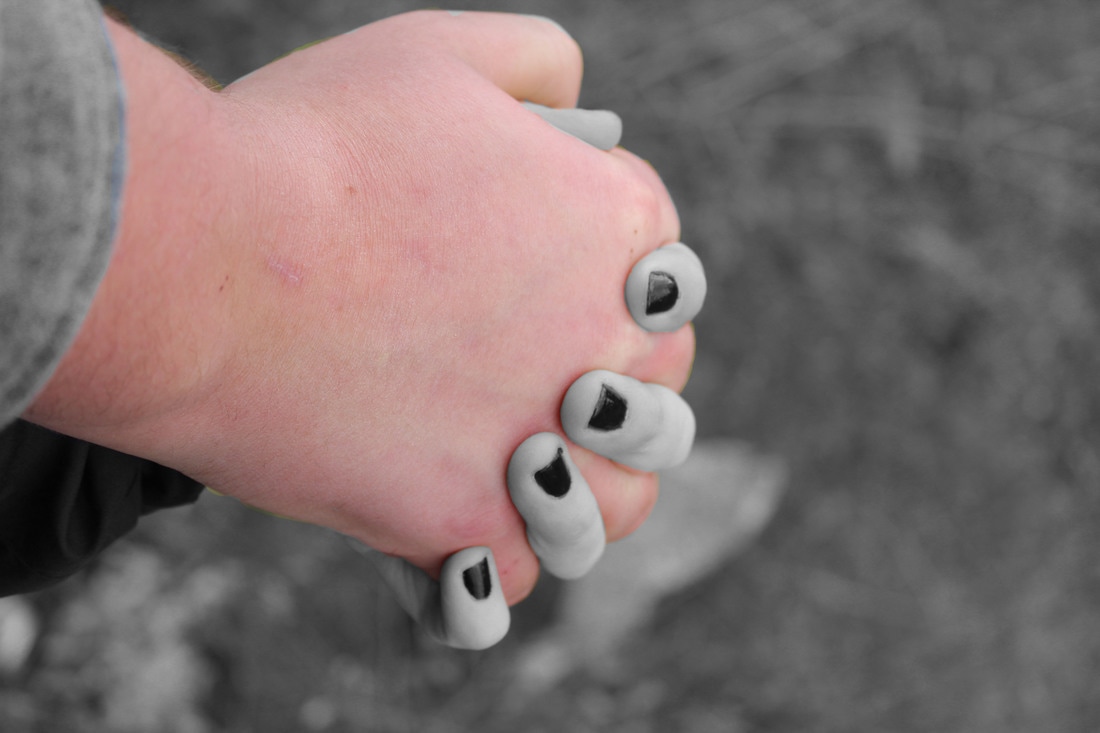
Textures can be used in many ways, examples can be of photoshopping things together, such as putting scales upon a human arm, or using double exposure. There are many, countless, ways to use textures within photography, and I am very glad to experience this workshop.
Within my extensive research I found that using texture photography is pretty simple, it's literally found in everything! Texture is found by simply taking a photo, and it shows purely by the textures you've taken.
I've also found this website to be extremely helpful with taking texture photography: https://www.picturecorrect.com/tips/texture-in-photography/
The website covers composition and how you can take eye catching photos to get the viewer intrigued.
While taking photos that focus on textures within photography, you have to keep in mind the 3 most important aspects of composition which include: contrast, curves and patterns.
Taking these aspects in mind, you'll find that finding the right photos for texture photography is simply easy. Though I've previously said that using a close up shot is nice, you can also use landscape mode in order to take photos with textures of landscape; which is shown here: http://ronbigelow.com/articles/texture-photography/texture-photography.html
Ron explains that textures aren't always found close up, but they can also be found in the landscape photos that you take.
There are many options for taking textured photos, so experience every possible way you can!
Another helpful website I found explains how contrast, light, depth, patterns and colours.https://www.google.ca/amp/s/photographylife.com/how-to-photograph-textures/amp/
It's really helpful, and the photographer behind this article shows some great tips within the textured realm.
While taking various photos of my animals, I found that letting them do their own thing and you the photographer should remain patient, as this project will take a while.
For my settings I used close up, portrait, landscape & manual exposure. These settings enable you to get up close and personal with the subject/textures your taking photos of. For my photos, I used flash & a black background to get the affect of my animals looking like models. To do this use a black blanket or black paper to show the affect, which some photographers use to make textures, colours, or even the subject to stand out. This gives your photos a professional look.
Animals are on the go, so taking photos can be a hassle at times. Use a fast shutter speed and be patient. Also, take plenty of photos, as it will take you a while before you get the right shot.
Textures are also come in a variety. You find textures in leaves, ground/gravel, etc etc. Textures can be found in everything, thus try your best to find textures in areas you wouldn't think of.
While taking photos of textures, you can see that within my photos that there is a lot of textures upon textures. When this happens the textures layer upon each other, some may stand out than others but it is very noticeable and quite unique.
Textures can be used in many ways, examples can be of photoshopping things together, such as putting scales upon a human arm, or using double exposure. There are many, countless, ways to use textures within photography, and I am very glad to experience this workshop.
Within my extensive research I found that using texture photography is pretty simple, it's literally found in everything! Texture is found by simply taking a photo, and it shows purely by the textures you've taken.
I've also found this website to be extremely helpful with taking texture photography: https://www.picturecorrect.com/tips/texture-in-photography/
The website covers composition and how you can take eye catching photos to get the viewer intrigued.
While taking photos that focus on textures within photography, you have to keep in mind the 3 most important aspects of composition which include: contrast, curves and patterns.
Taking these aspects in mind, you'll find that finding the right photos for texture photography is simply easy. Though I've previously said that using a close up shot is nice, you can also use landscape mode in order to take photos with textures of landscape; which is shown here: http://ronbigelow.com/articles/texture-photography/texture-photography.html
Ron explains that textures aren't always found close up, but they can also be found in the landscape photos that you take.
There are many options for taking textured photos, so experience every possible way you can!
Another helpful website I found explains how contrast, light, depth, patterns and colours.https://www.google.ca/amp/s/photographylife.com/how-to-photograph-textures/amp/
It's really helpful, and the photographer behind this article shows some great tips within the textured realm.
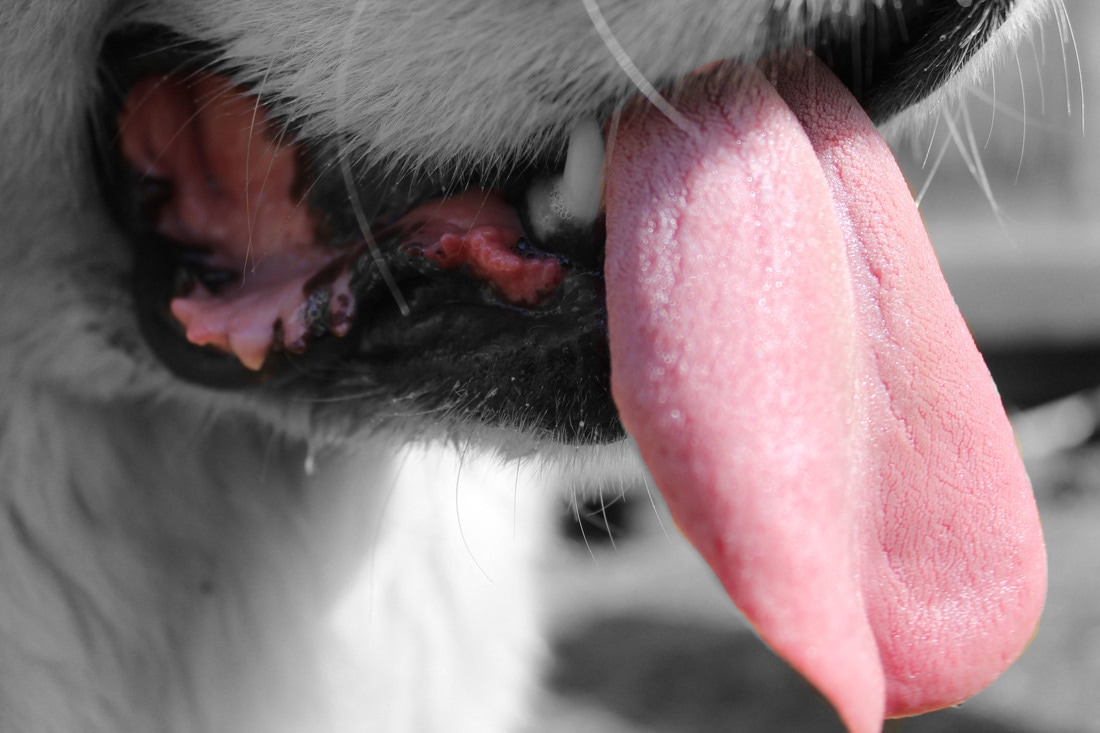
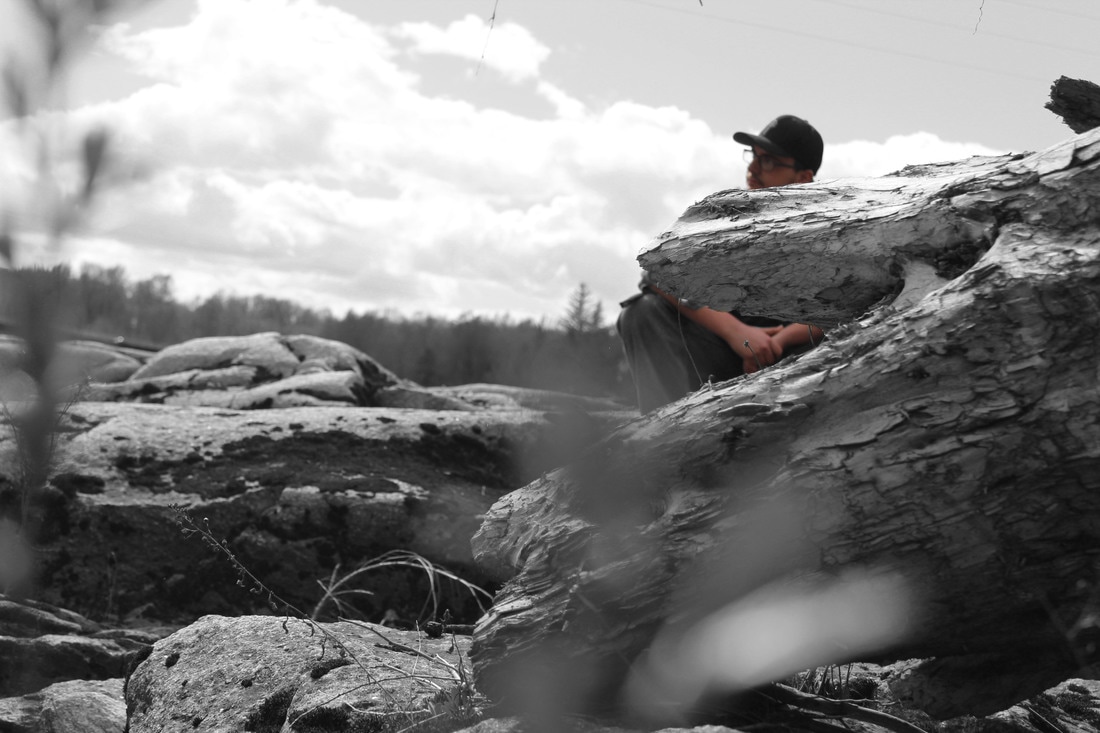
Independent Project #1 - Colour splash #2
Here are some added additions to the previous colour splash project. I enjoyed taking the last photos so I decided to add more to this vast array of photos. Very enjoyable.


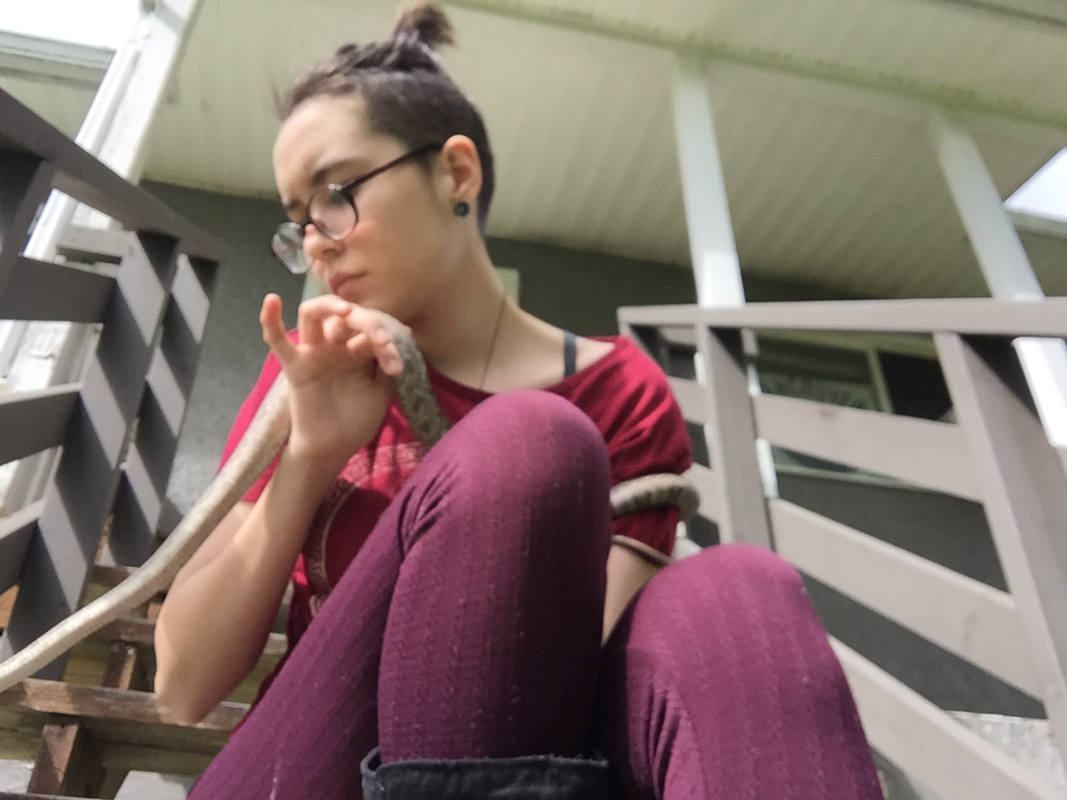
Independent Project #1 - Colour Splash
This is an assignment for the photo 11 class, but I wanted to try it out for myself. My favourite photo is my ball python and my hand, the fourth photo in this project. I enjoy splash photography because it shows how things can pop out and look pleasing to the eye.
EDIT:
I approached this independent photo project with open arms, I have previously shown some interest and have done "colour splash" before in grade 11. I enjoyed this project indefinitely, by taking some memorial photos of everyday life. I came across some beautiful sceneries, and I used my animals as models to show that beauty can be shown by masking out background out and making the image or subject pop! I have gotten inspiration from instagram and tumblr by coming across many photos that mask out subjects and by making them stand out. Spending time on getting the right shots is what I had spent my time on the most, editing was simple and easy. I found that there are many tutorials on youtube that explain how to achieve the "colour splash" affect. This tutorial I found to work well: https://www.youtube.com/watch?v=fjUWPRvpjhI&t=47s
I feel that this project was very successful and was a lot of fun to create. My favourite aspect is definitely the outcome, the photos turn out gorgeous and the models just pop! Making the photo look pleasing to the viewers eye.
Advice I'd give would be to be patient! Taking the "right" photo to work with colour splash can be a pain, but definitely be patient and keep trying!


Open portrait Project - may 15th/2016

subject study - 2016